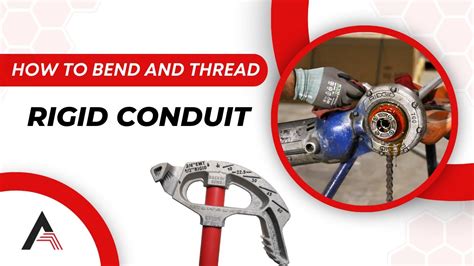
How To Bend Rigid Conduit
Ronan Farrow
Mar 23, 2025 · 3 min read

Table of Contents
How to Bend Rigid Conduit: A Comprehensive Guide for Electricians
Rigid conduit, known for its durability and strength, presents a unique challenge when it comes to bending. Unlike flexible conduits, rigid conduit requires specific techniques and tools to achieve accurate bends without kinking or damaging the conduit itself. This guide will walk you through the process, ensuring you create clean, professional bends every time.
Essential Tools for Bending Rigid Conduit
Before you begin, gather the necessary tools. Having everything ready beforehand will make the process smoother and more efficient. These are essential:
- Bending Shoe: This is the cornerstone of successful conduit bending. It provides a precise and consistent bend radius. Choose a shoe that's appropriately sized for your conduit diameter.
- Hydraulic Conduit Bender: While manual benders exist, a hydraulic bender offers significantly more leverage and control, particularly for larger diameter conduits.
- Conduit Bender (Manual): A good option for smaller diameter conduits and less frequent bending needs.
- Measuring Tape: Accuracy is paramount; a reliable measuring tape is crucial for precise bends.
- Marking Tool: Use a marker or pencil to clearly indicate your bend points on the conduit.
- Safety Glasses: Protect your eyes from debris and potential sparks.
- Work Gloves: Protect your hands from scratches and abrasions.
Understanding the Bending Process: Steps to Success
The key to a successful bend lies in understanding the relationship between the conduit's diameter, the desired bend radius, and the bender's settings.
Step 1: Measuring and Marking
- Determine the Bend Radius: Consult a conduit bending chart (easily found online) to determine the appropriate bend radius for your conduit diameter and the desired bend angle. This chart will provide the exact measurement from the end of the conduit to the center of the bend.
- Mark the Conduit: Accurately mark your starting point (the heel of the bend) and the center of the bend using your measuring tape and marking tool.
Step 2: Secure the Conduit
- Position in the Bender: Carefully insert the conduit into the bending shoe of your chosen bender, ensuring it's firmly seated and aligned correctly. The marked heel of the bend should be precisely positioned against the bender's stop.
Step 3: Executing the Bend
- Apply Pressure: Gradually apply pressure to the bender, whether it's manual or hydraulic. Avoid jerky movements; a smooth, controlled application of force is critical to prevent kinking.
- Monitor the Bend: Carefully watch the conduit as it bends to ensure it follows the desired radius. Stop immediately if you notice any resistance or uneven bending.
Step 4: Verification and Adjustment
- Check the Bend: After completing the bend, carefully check its accuracy against your measurements and the bending chart. Slight adjustments may be needed to fine-tune the bend angle and radius.
Troubleshooting Common Bending Problems
- Kinking: This typically results from applying too much force too quickly or using an improperly sized bender. Using a hydraulic bender can greatly reduce the chance of kinking.
- Uneven Bends: This often arises from incorrect alignment of the conduit within the bender. Carefully double-check the alignment before applying pressure.
- Wrinkling: This can occur due to the conduit being overly stressed. Ensure the bend radius is within the appropriate range for your conduit diameter.
Tips for Professional Results
- Practice Makes Perfect: Practice on scrap conduit before working on your actual project. This will help you develop a feel for the process and improve your technique.
- Choose the Right Bender: Invest in a quality bender that is appropriate for the size and type of conduit you'll be working with.
- Safety First: Always wear appropriate safety gear, including safety glasses and work gloves.
By following these steps and practicing diligently, you can master the art of bending rigid conduit and produce clean, precise bends for all your electrical projects. Remember, accuracy and safety are paramount in this process.
Featured Posts
Also read the following articles
| Article Title | Date |
|---|---|
| How Often Do Hognose Snakes Shed | Mar 23, 2025 |
| How Thick Is Tile And Thinset | Mar 23, 2025 |
| How Much Is Coors Light | Mar 23, 2025 |
| How Much Is Matte Ppf | Mar 23, 2025 |
| How To Anchor A Gazebo To A Deck | Mar 23, 2025 |
Latest Posts
-
How Long Does Termite Treatment Take To Work
Apr 06, 2025
-
How Long Does Team Teach Training Last
Apr 06, 2025
-
How Long Does Tart Cherry Juice Last
Apr 06, 2025
-
How Long Does Swedish Candy Last
Apr 06, 2025
-
How Long Does Suboxone Stay In Breastmilk
Apr 06, 2025
Thank you for visiting our website which covers about How To Bend Rigid Conduit . We hope the information provided has been useful to you. Feel free to contact us if you have any questions or need further assistance. See you next time and don't miss to bookmark.
