How To Clean Egg Incubator
Ronan Farrow
Mar 24, 2025 · 3 min read

Table of Contents
How to Clean Your Egg Incubator: A Step-by-Step Guide for Hatching Success
Maintaining a clean egg incubator is crucial for successful hatching. A dirty incubator can harbor bacteria and fungi, leading to disease and reduced hatching rates. This comprehensive guide will walk you through the process of thoroughly cleaning your incubator, ensuring optimal conditions for your precious eggs.
Preparing for the Cleaning Process
Before you begin, gather your cleaning supplies. You'll need:
- Warm, soapy water: A mild dish soap is ideal. Avoid harsh chemicals that could damage the incubator's components or leave harmful residues.
- Clean cloths or sponges: Use separate cloths for washing and rinsing. Paper towels are also useful for spot cleaning.
- A disinfectant solution: A diluted solution of bleach (1 part bleach to 9 parts water) or a commercial egg incubator disinfectant is recommended. Always follow the manufacturer's instructions for dilution and usage.
- A stiff-bristled brush: This is helpful for scrubbing away stubborn debris.
- Protective gloves: Always wear gloves when handling disinfectants.
Step-by-Step Cleaning Instructions
1. Power Down and Disconnect: The first and most important step is to completely unplug your incubator from the power source. This prevents accidental shocks and ensures safety.
2. Remove All Items: Take out all eggs, trays, water trays, and any other removable components. Set them aside for individual cleaning.
3. Initial Cleaning: Use warm, soapy water and a clean cloth or sponge to wipe down the interior of the incubator. Pay close attention to corners and crevices where dirt and debris tend to accumulate.
4. Deep Cleaning with Disinfectant: Once the initial cleaning is complete, apply your chosen disinfectant solution. Use a clean cloth or sponge to thoroughly wipe down all surfaces, including the walls, floor, and any remaining components inside the incubator. Allow the disinfectant to sit for the recommended contact time (usually 10-15 minutes) before rinsing.
5. Rinsing: After the disinfectant has sat, rinse the entire interior of the incubator thoroughly with clean water. Ensure all traces of soap and disinfectant are removed.
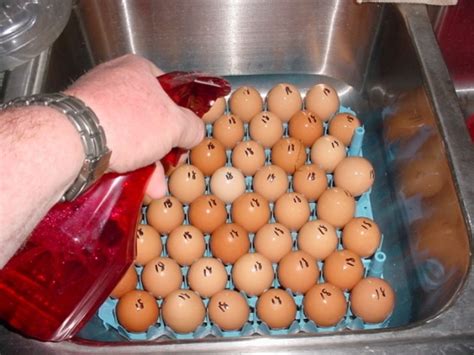
6. Cleaning Removable Components: Clean all removable components (trays, water trays, etc.) separately using the same warm, soapy water and disinfectant process. Pay extra attention to cleaning any cracks or crevices. Allow them to air dry completely before putting them back in the incubator.
7. Drying: Allow the incubator to air dry completely. You can use a clean, dry cloth to help speed up the process. Never use a hairdryer or other heat source to dry the incubator.
8. Final Inspection: Once everything is completely dry, perform a final inspection to ensure all surfaces are clean and free of any debris.
Maintaining a Clean Incubator Between Hatching Cycles
To minimize cleaning between uses, it is recommended to practice good hygiene throughout the hatching process:
- Regularly wipe down spills: Clean up any spills immediately to prevent the build-up of bacteria and mold.
- Monitor for unusual smells: A foul odor is a sign that cleaning is needed.
- Sanitize frequently used tools: Clean and disinfect any tools used inside the incubator regularly.
Preventing Problems: Proactive Measures
- Proper Ventilation: Ensure your incubator has adequate ventilation to prevent the build-up of moisture and bacteria.
- Temperature and Humidity Control: Maintaining the correct temperature and humidity levels minimizes the risk of bacterial or fungal growth.
- Regular Cleaning Schedule: Develop a regular cleaning schedule to prevent the build-up of dirt and debris.
By following these steps and implementing proactive measures, you can ensure a clean and healthy environment for your eggs, maximizing your chances of successful hatching. Remember, a clean incubator is a happy incubator!
Featured Posts
Also read the following articles
| Article Title | Date |
|---|---|
| How To Get Rid Of Sand In Pool | Mar 24, 2025 |
| How To Get An Annulment In Tennessee | Mar 24, 2025 |
| How To Get A Car Wash | Mar 24, 2025 |
| How To Concealed Carry In Gym Shorts | Mar 24, 2025 |
| How To Get Window Sticker From Vin | Mar 24, 2025 |
Latest Posts
-
How Long Before Outboard Spits Water
Apr 05, 2025
-
How Long Before Exterior Paint Can Get Wet
Apr 05, 2025
-
How Long Before A Cavity Becomes A Root Canal
Apr 05, 2025
-
How Long Are Youth Lacrosse Games
Apr 05, 2025
-
How Long Are You Numb For After A Filling
Apr 05, 2025
Thank you for visiting our website which covers about How To Clean Egg Incubator . We hope the information provided has been useful to you. Feel free to contact us if you have any questions or need further assistance. See you next time and don't miss to bookmark.
