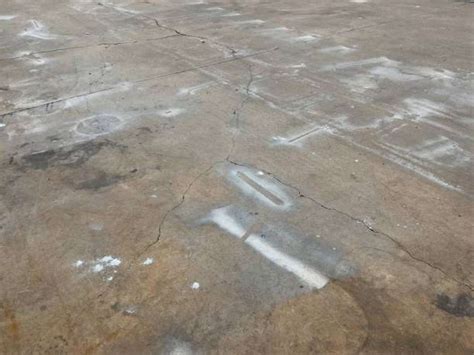
How To Fix Low Spots In Concrete
Ronan Farrow
Mar 24, 2025 · 3 min read

Table of Contents
How to Fix Low Spots in Concrete: A Comprehensive Guide
Uneven concrete surfaces are a common eyesore, tripping hazard, and potential source of bigger problems down the line. Whether it's a small dip in your driveway or a larger depression in your patio, knowing how to fix low spots in concrete is a valuable DIY skill. This guide will walk you through the process, from assessment to finishing touches.
Assessing the Damage: Understanding the Severity of the Low Spot
Before you grab your tools, it's crucial to accurately assess the extent of the damage. This will determine the best repair method and the materials you'll need.
Identifying the Cause:
Understanding why the low spot exists is just as important as fixing it. Common causes include:
- Settlement: This is the most common culprit, often caused by inadequate compaction of the underlying soil.
- Erosion: Water damage can wash away supporting soil, leading to concrete settling.
- Cracking: Significant cracks can indicate more serious structural issues requiring professional attention.
- Poor Installation: Improperly mixed or poured concrete can lead to settling and uneven surfaces.
Determining the Size and Depth:
Measure the length, width, and depth of the low spot. This will help you determine the amount of patching material required. For small dips, a simple patching compound might suffice. For larger areas, a more substantial repair may be needed.
Choosing the Right Repair Method: From Patching to Overlaying
The best repair method depends on the size and severity of the low spot.
Small Low Spots (<1 inch deep):
For minor imperfections, using a concrete patching compound is often the easiest and most effective solution. These compounds are designed to adhere to existing concrete and fill small gaps.
- Preparation is Key: Clean the area thoroughly, removing any loose debris or dirt. Lightly roughen the surface to improve adhesion.
- Mixing and Application: Follow the manufacturer's instructions for mixing and applying the patching compound. Ensure a smooth, even finish.
- Curing: Allow the patch to cure completely before applying any weight or traffic.
Larger Low Spots (≥1 inch deep):
Larger depressions require a more involved approach, potentially involving:
- Undercutting: This involves removing a small amount of the surrounding concrete to create a key for better bonding. This is only necessary for significant low spots.
- Base Preparation: For substantial repairs, you may need to add a layer of gravel or compacted base material to build up the area before applying the concrete patch.
- Concrete Mix: Use a pre-mixed concrete or create your own using cement, sand, and gravel.
Full Overlay:
For extensive damage or a severely uneven surface, consider a full overlay. This involves removing the existing concrete and pouring a new layer. This method is more labor-intensive but yields a smoother, more durable result.
Essential Tools and Materials
Having the right tools and materials on hand will ensure a smooth and efficient repair process. Common necessities include:
- Shovel or Hammer and Chisel (for undercutting)
- Broom and Dustpan
- Measuring Tape
- Concrete Patching Compound or Pre-mixed Concrete
- Mixing Bucket and Trowel
- Level
- Gloves and Safety Glasses
- Water Source
Completing the Repair and Finishing Touches
Regardless of the method chosen, remember these important steps:
- Proper Curing: Allow the repaired area to cure properly, following the manufacturer's instructions or guidelines for concrete curing. This generally involves keeping the concrete moist for several days.
- Smoothing the Surface: Use a trowel or other smoothing tools to create an even, seamless finish.
- Sealing (Optional): Applying a concrete sealer can help protect the repair and enhance its durability.
When to Call a Professional
While many concrete repairs are DIY-friendly, some situations warrant professional help:
- Extensive Cracks or Structural Damage: Significant cracks or damage could indicate underlying foundation problems.
- Large-Scale Repairs: Large-scale repairs or full overlays are often best left to experienced professionals.
- Lack of DIY Experience: If you're uncomfortable tackling the repair yourself, it's always best to hire a professional.
By following these steps, you can effectively repair low spots in your concrete surfaces, restoring both the aesthetics and functionality of your outdoor spaces. Remember safety first, and don't hesitate to call in the professionals if the task seems overwhelming.
Featured Posts
Also read the following articles
| Article Title | Date |
|---|---|
| How To Get To Puerto Natales | Mar 24, 2025 |
| How To Get Cell Phone Service In Remote Areas | Mar 24, 2025 |
| How To Clean Wood Banisters | Mar 24, 2025 |
| How To Hang Bear Rug On Wall | Mar 24, 2025 |
| How To Connect Apple Carplay To Nissan | Mar 24, 2025 |
Latest Posts
-
How Long After A Dental Implant Can I Drink Alcohol
Apr 05, 2025
-
How Long After A Cortisone Shot Can I Take Aleve
Apr 05, 2025
-
How Long After A Chiropractic Adjustment Can I Workout
Apr 05, 2025
-
How Long After A Cartilage Piercing Can You Swim
Apr 05, 2025
-
How Long After A Brow Lamination Can I Shower
Apr 05, 2025
Thank you for visiting our website which covers about How To Fix Low Spots In Concrete . We hope the information provided has been useful to you. Feel free to contact us if you have any questions or need further assistance. See you next time and don't miss to bookmark.
