How To Paint A Motorcycle Frame
Ronan Farrow
Mar 25, 2025 · 3 min read
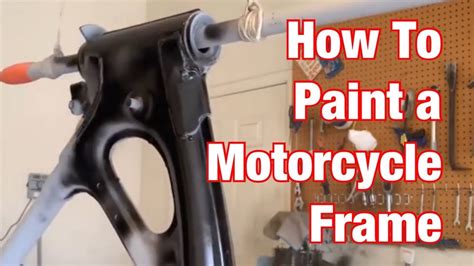
Table of Contents
How to Paint a Motorcycle Frame: A Comprehensive Guide
Painting your motorcycle frame can be a rewarding project, transforming the look of your bike and potentially increasing its value. This guide will walk you through the process, ensuring a professional-looking finish that lasts. Remember safety first! Always wear appropriate safety gear, including gloves, eye protection, and a respirator when working with paints and solvents.
Preparation is Key: Cleaning and Stripping
Before you even think about picking up a paintbrush, meticulous preparation is crucial for a long-lasting, flawless finish. This stage often takes longer than the actual painting!
Thorough Cleaning
Start by thoroughly cleaning the frame. Use a degreaser to remove any grease, grime, oil, or wax. Pay close attention to hard-to-reach areas. A wire brush, followed by a pressure washer (if accessible and safe for your frame's material), can be incredibly effective. Finish with a solvent wipe-down to ensure complete cleanliness.
Removing Old Paint
This is arguably the most important step. Existing paint needs to be completely removed to ensure proper adhesion of your new paint. Several methods exist:
- Sandblasting: This is the most effective method for removing all traces of old paint, but requires specialized equipment and can be damaging if not done correctly.
- Chemical Strippers: These are effective but require careful handling due to their harsh chemicals. Always follow the manufacturer's instructions meticulously and work in a well-ventilated area.
- Sanding: While time-consuming, sanding can be effective for removing less stubborn paint. Start with coarser grit sandpaper and gradually move to finer grits to achieve a smooth surface.
Important Note: No matter the method, ensure the frame is completely free of old paint, rust, and any imperfections before proceeding.
Priming for Perfect Adhesion
Priming is essential for optimal paint adhesion and corrosion protection. Choose a primer specifically designed for metal and compatible with your chosen paint type (e.g., acrylic, urethane).
Applying the Primer
Apply the primer in thin, even coats, allowing each coat to dry completely before applying the next. Two to three coats are usually sufficient. Ensure the primer is evenly distributed, addressing any imperfections from the previous stage. Light sanding between coats can create a smoother surface for the topcoat.
Painting Your Motorcycle Frame: Techniques and Tips
Now for the fun part! With your frame prepped and primed, you're ready to paint.
Choosing Your Paint
Select a high-quality paint designed for outdoor use and able to withstand the elements. Consider factors like color, finish (gloss, matte, satin), and durability.
Application Methods
- Spray Gun: Provides the most even and professional-looking finish, but requires specialized equipment and practice.
- Aerosol Cans: A convenient option for smaller projects or touch-ups, but can be prone to runs and drips if not applied carefully.
- Brush: Least recommended for a motorcycle frame due to the potential for brush strokes to be visible.
Pro Tip: Regardless of your chosen method, apply thin, even coats, allowing each coat to dry completely before applying the next. Several thin coats are better than one thick coat, which can lead to runs and an uneven finish.
Clear Coating for Protection
After the paint has fully cured, apply several coats of clear coat to protect your hard work. Clear coat adds durability, UV protection, and a glossy finish (if desired). Remember to allow sufficient drying time between coats.
Final Thoughts: Patience and Precision
Painting a motorcycle frame is a labor of love. Patience and attention to detail are essential for achieving a professional finish. Taking your time, following these steps meticulously, and investing in quality materials will result in a stunning transformation of your motorcycle. Remember to thoroughly clean your tools and workspace after completing the project.
Featured Posts
Also read the following articles
| Article Title | Date |
|---|---|
| How To Identify Old Pawn Jewelry | Mar 25, 2025 |
| How To Make Cornbread Without Eggs Or Milk | Mar 25, 2025 |
| How To Read Sweat Patch Results | Mar 25, 2025 |
| How To Remove A Walk In Bathtub | Mar 25, 2025 |
| How To Make Boot Covers Cosplay | Mar 25, 2025 |
Latest Posts
Thank you for visiting our website which covers about How To Paint A Motorcycle Frame . We hope the information provided has been useful to you. Feel free to contact us if you have any questions or need further assistance. See you next time and don't miss to bookmark.

