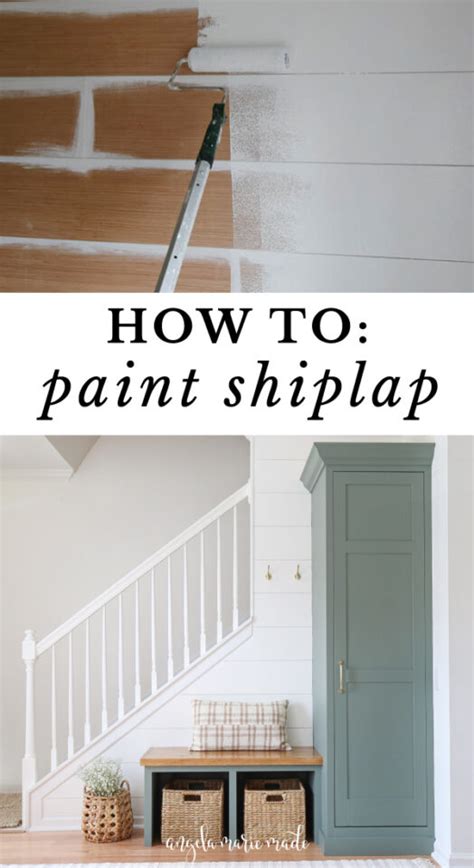
How To Paint Shiplap Walls
Ronan Farrow
Mar 19, 2025 · 4 min read

Table of Contents
How to Paint Shiplap Walls: A Comprehensive Guide
Shiplap walls are a popular choice for adding rustic charm and texture to any room. But painting shiplap can seem daunting. This comprehensive guide will walk you through the process step-by-step, ensuring a professional-looking finish every time. We'll cover everything from prepping your walls to achieving the perfect paint finish, making this DIY project achievable even for beginners.
Preparing Your Shiplap Walls for Painting
Before you even think about grabbing a paintbrush, proper preparation is key to a flawless finish. This phase might seem tedious, but it's the foundation of a successful project:
1. Cleaning Your Shiplap:
- Dust and Debris Removal: Start by thoroughly cleaning your shiplap walls. Use a vacuum cleaner with a brush attachment to remove dust, cobwebs, and loose debris. Pay close attention to the grooves between the boards.
- Washing for a Deeper Clean: For heavily soiled walls, a gentle wash with warm soapy water is recommended. Use a soft sponge or cloth, avoiding harsh scrubbing that could damage the wood. Rinse thoroughly and allow the walls to dry completely. This is crucial for paint adhesion.
2. Repairing Imperfections:
- Filling Gaps and Cracks: Inspect your shiplap for any gaps, cracks, or imperfections. Use wood filler to fill these areas, allowing ample drying time before sanding smooth.
- Sanding for a Smooth Surface: Once the filler is dry, lightly sand the repaired areas with fine-grit sandpaper to create a smooth, even surface. Wipe away any sanding dust with a tack cloth. This step ensures a uniform paint application.
3. Priming Your Shiplap (Optional but Recommended):
- Why Prime? Priming provides a better surface for the paint to adhere to, resulting in a more even finish and increased paint longevity. It's especially important if you're painting over a dark color or using a lighter shade.
- Primer Selection: Choose a primer appropriate for your shiplap material (e.g., oil-based or water-based). Follow the manufacturer's instructions for application.
Painting Your Shiplap Walls: A Step-by-Step Approach
Now for the fun part! Painting your shiplap walls is easier than you think with the right techniques:
1. Choosing Your Paint:
- Type of Paint: Consider using a high-quality paint designed for interior walls. A semi-gloss or satin finish is ideal for shiplap, as it's durable and easy to clean.
- Color Selection: Choose a color that complements your existing décor. Don't be afraid to experiment with different shades to find the perfect fit for your space.
2. Gathering Your Supplies:
- Paint: Ensure you have enough paint to cover your walls. It's always better to have extra on hand than to run out mid-project.
- Paintbrushes and Rollers: A high-quality brush is essential for precise application in the grooves. A small roller will speed up the process on the larger areas of the boards.
- Paint Tray: A good paint tray will make paint application much more efficient and less messy.
- Painter's Tape (Optional): If you're only painting the shiplap and want crisp lines where it meets another surface, use painter's tape. Be sure to remove it before the paint fully dries.
- Drop Cloths: Protect your floors and any furniture from paint splatters.
3. Painting Technique:
- Cutting In: Begin by using your brush to "cut in" along the edges of the shiplap, around windows, and in corners.
- Rolling: Use your roller to efficiently cover the larger surfaces of the shiplap boards. Apply thin, even coats to avoid drips and runs. Work in sections to maintain a wet edge.
- Multiple Coats: Apply multiple coats of paint for optimal coverage and color depth. Allow each coat to dry completely before applying the next.
4. Final Touches:
- Inspect for Imperfections: Once the paint is completely dry, carefully inspect the walls for any imperfections. Address any touch-ups as needed.
- Clean Up: Clean your brushes and rollers thoroughly according to the paint manufacturer's instructions.
Maintaining Your Painted Shiplap
- Regular Cleaning: Dust regularly with a soft cloth or vacuum cleaner. For more stubborn stains, wipe with a damp cloth using a gentle cleaner.
- Touch-Ups: Over time, minor scratches or chips may occur. Keep a small amount of your original paint on hand for easy touch-ups.
By following these steps, you can successfully paint your shiplap walls and achieve a stunning, professional finish. Remember, preparation is key, and taking your time will yield the best results! Happy painting!
Featured Posts
Also read the following articles
| Article Title | Date |
|---|---|
| How To Reduce Back Pain After C Section Naturally | Mar 19, 2025 |
| How To Remove Throttle Cable From Carb | Mar 19, 2025 |
| How To Rest A Brisket In The Oven | Mar 19, 2025 |
| How To Replace Steering Cable On Boat | Mar 19, 2025 |
| How To Remove Gunpowder Residue | Mar 19, 2025 |
Latest Posts
Thank you for visiting our website which covers about How To Paint Shiplap Walls . We hope the information provided has been useful to you. Feel free to contact us if you have any questions or need further assistance. See you next time and don't miss to bookmark.
