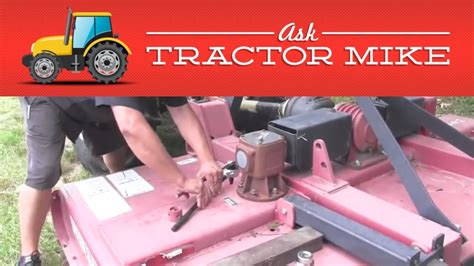
How To Remove Brush Hog Blades
Ronan Farrow
Mar 25, 2025 · 3 min read

Table of Contents
How to Remove Brush Hog Blades: A Step-by-Step Guide
Removing brush hog blades might seem daunting, but with the right tools and approach, it's a manageable task. This guide provides a comprehensive, step-by-step process to safely and efficiently remove your brush hog blades, ensuring your safety and the longevity of your equipment.
Safety First: Essential Precautions
Before you even think about touching those blades, safety must be your top priority. Brush hog blades are incredibly sharp and powerful. One slip can lead to serious injury.
- Disconnect the PTO: This is crucial. Never attempt to remove blades while the PTO (Power Take-Off) is engaged. Make absolutely sure the tractor's engine is off and the PTO is disengaged.
- Use the Right Tools: Gather the necessary tools before you begin. This prevents unnecessary reaching and fumbling while working with the sharp blades. You'll likely need wrenches (sizes vary depending on your model), gloves, safety glasses, and possibly a jack stand for added stability.
- Work in a Well-Lit Area: Adequate lighting is crucial to ensure you can see clearly what you're doing. Avoid working in low light conditions.
- Wear Protective Gear: Always wear heavy-duty work gloves, safety glasses, and sturdy, closed-toe shoes. Consider a face shield for added protection.
- Secure the Brush Hog: If possible, use jack stands or chocks to keep the brush hog stable and prevent accidental movement.
Step-by-Step Blade Removal
The specific steps may vary slightly depending on the make and model of your brush hog, but the general process remains consistent. Always consult your owner's manual for detailed instructions specific to your equipment.
1. Accessing the Blades:
- Identify Blade Retention System: Determine how the blades are attached. Common methods include bolts, pins, or a combination thereof.
- Remove any Guards or Covers: Carefully remove any protective guards or covers that might obstruct access to the blades.
2. Loosening and Removing the Blades:
- Use the Correct Wrench: Employ the appropriate size wrench to loosen the nuts or bolts securing the blades. Turn counter-clockwise to loosen.
- Remove the Fasteners: Once loosened, carefully remove the nuts, bolts, or pins, keeping them organized. Consider placing them in a container to prevent loss.
- Gently Remove the Blade: Carefully remove the blade. It may be heavy, so handle it with caution.
3. Cleaning and Inspection:
- Clean the Hub: Use a wire brush or other suitable tool to clean the blade hubs. Remove any debris or rust.
- Inspect the Blades: Examine each blade for any signs of damage, cracks, or excessive wear. Replace damaged blades immediately.
- Inspect the Hubs: Look for any signs of wear or damage to the blade hubs.
4. Blade Replacement (Optional):
- Install New Blades (If Necessary): If you're replacing blades, follow the manufacturer's instructions carefully. Ensure they are installed correctly and securely tightened.
Reassembly: Following the Steps in Reverse
Once you've completed the necessary cleaning and inspection, reassemble the brush hog by reversing the steps above. Make sure all fasteners are securely tightened to prevent blade detachment during operation.
Troubleshooting:
If you encounter any difficulties, consult your owner's manual or seek assistance from a qualified mechanic. Never force anything.
Remember, safety is paramount. By following these steps and prioritizing safety, you can confidently remove and replace your brush hog blades. This will ensure the proper function of your equipment and help prevent accidents.
Featured Posts
Also read the following articles
| Article Title | Date |
|---|---|
| How To Prep Steel For Painting | Mar 25, 2025 |
| How To Print Medication List In Epic 2024 | Mar 25, 2025 |
| How To Remove Towel Lint | Mar 25, 2025 |
| How To Recline Jeep Wrangler Seat | Mar 25, 2025 |
| How To Know Your Patron Saint | Mar 25, 2025 |
Latest Posts
Thank you for visiting our website which covers about How To Remove Brush Hog Blades . We hope the information provided has been useful to you. Feel free to contact us if you have any questions or need further assistance. See you next time and don't miss to bookmark.
