How To Repair Masonite Siding
Ronan Farrow
Mar 25, 2025 · 3 min read

Table of Contents
How to Repair Masonite Siding: A Comprehensive Guide
Masonite siding, while offering a cost-effective and aesthetically pleasing exterior, isn't impervious to damage. Understanding how to repair it effectively can save you significant costs in the long run, extending the lifespan of your home's exterior. This guide offers a step-by-step approach to common Masonite siding repairs.
Assessing the Damage: The First Step to Repair
Before you grab your tools, carefully inspect the damaged area. Different types of damage require different repair techniques. Common issues include:
- Small Dents and Scratches: These are often superficial and relatively easy to fix.
- Cracks: Depending on the size and location, cracks can be repaired with fillers or may necessitate more extensive patching.
- Holes: Holes require patching and often careful color matching to blend seamlessly with the existing siding.
- Rotting or Water Damage: This is the most serious type of damage and often requires replacing the affected siding panel.
Tools and Materials You'll Need
Gather these essential tools and materials before starting your repair project:
- Putty Knife: For cleaning and applying filler.
- Sandpaper: Various grits (e.g., 80, 120, 220) for smoothing surfaces.
- Wood Filler: Choose a filler that's compatible with Masonite and matches the siding's color as closely as possible. Exterior-grade wood filler is crucial for weather resistance.
- Caulk: Exterior-grade caulk is vital for sealing gaps and cracks to prevent further water damage.
- Primer: Use a primer designed for exterior use and compatible with Masonite to ensure proper adhesion of the paint.
- Paint: Choose a high-quality exterior paint that matches your existing siding.
- Paintbrush or Roller: For applying primer and paint.
- Safety Glasses and Gloves: Always prioritize safety!
Repairing Minor Damages: Dents and Scratches
For small dents and scratches, a simple approach often suffices:
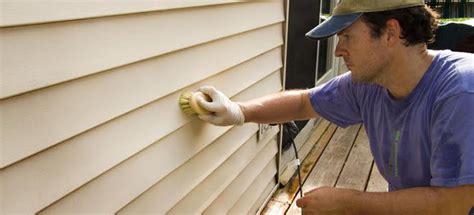
- Clean the Area: Thoroughly clean the damaged area with soap and water to remove dirt and debris. Allow it to dry completely.
- Apply Wood Filler: Use a putty knife to carefully apply a small amount of wood filler to the dent or scratch.
- Smooth the Surface: Once the filler has dried (check the product instructions for drying time), use sandpaper to smooth the surface until it's level with the surrounding siding. Start with a coarser grit and gradually move to finer grits.
- Prime and Paint: Apply a thin coat of exterior primer, followed by a coat of exterior paint that matches your siding.
Repairing Larger Damages: Cracks and Holes
Larger cracks and holes require a more involved repair process:
- Clean and Prepare: Clean the area thoroughly and remove any loose or damaged material.
- Apply Wood Filler: For cracks, apply wood filler to fill the gap completely. For holes, use wood filler to build up the area, allowing it to dry completely between layers.
- Sand Smoothly: Once the filler is dry, carefully sand the surface to create a smooth transition with the surrounding siding.
- Caulk the Edges: Apply a bead of exterior-grade caulk around the edges of the repaired area to seal it and prevent water penetration.
- Prime and Paint: Apply primer and paint as described above, ensuring a smooth, even finish.
Replacing Damaged Sections: Severe Cases
If the damage is extensive (e.g., significant rot or water damage), replacing the affected section is the most effective solution. This often involves removing the damaged panel and installing a new one, which may require additional tools and expertise.
Maintenance: Preventing Future Damage
Regular maintenance is key to preventing future repairs. This includes:
- Annual Inspections: Check your siding for any signs of damage, especially after harsh weather.
- Cleaning: Clean your siding regularly to remove dirt, debris, and mildew.
- Caulking: Inspect and recaulk areas where caulking has cracked or deteriorated.
By following these steps and employing preventative maintenance, you can keep your Masonite siding looking its best for years to come. Remember to always consult with a professional if you are unsure about any aspect of the repair process, especially for significant damage.
Featured Posts
Also read the following articles
| Article Title | Date |
|---|---|
| How To Recline Jeep Wrangler Seat | Mar 25, 2025 |
| How To Lower Compression Ratio | Mar 25, 2025 |
| How To Make San Pedro Tea | Mar 25, 2025 |
| How To Obtain A Surety Bond For Notary In Texas | Mar 25, 2025 |
| How To Keep Humidity In Terrarium | Mar 25, 2025 |
Latest Posts
-
How Great Though Art Sheet Music
Apr 04, 2025
-
How Great Thou Art Trumpet Sheet Music
Apr 04, 2025
-
How Great Thou Art Sheet Music Trumpet
Apr 04, 2025
-
How Great Our Joy Sheet Music
Apr 04, 2025
-
How Great Is Our God Chords Key Of G Pdf
Apr 04, 2025
Thank you for visiting our website which covers about How To Repair Masonite Siding . We hope the information provided has been useful to you. Feel free to contact us if you have any questions or need further assistance. See you next time and don't miss to bookmark.
