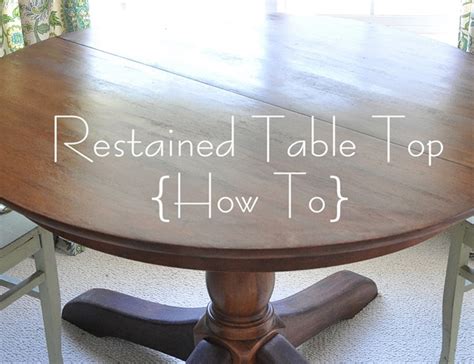
How To Restain An Oak Table
Ronan Farrow
Mar 26, 2025 · 3 min read

Table of Contents
How to Restrain an Oak Table: A Step-by-Step Guide
Refinishing an oak table can dramatically revitalize its look and feel, breathing new life into a cherished piece of furniture. This comprehensive guide will walk you through the process, ensuring a stunning result. Whether you're dealing with minor scratches or a complete overhaul, this step-by-step approach will help you achieve a professional-looking finish.
Preparing Your Oak Table for Refinishing
Before you even think about applying stain, proper preparation is crucial for a successful refinishing project. This initial phase lays the foundation for a long-lasting, beautiful finish.
1. Clean the Surface Thoroughly
Start by cleaning the table's surface to remove any dirt, grime, grease, or old wax buildup. Use a mild detergent and warm water, gently scrubbing with a soft cloth or sponge. Rinse thoroughly and allow the table to dry completely. This step is essential for ensuring the stain adheres properly.
2. Remove Existing Finish
Depending on the existing finish, you may need to sand the table to remove it. This might involve using a variety of sanding tools, ranging from coarse to fine grit sandpaper. Always wear a dust mask during sanding! Start with a coarser grit (like 80-100 grit) to remove the old finish and gradually move to finer grits (120-220 grit) to smooth the surface.
Important Note: If you're unsure about the type of finish, a test area can help you determine the best approach. You can use a chemical stripper as an alternative to sanding, but make sure to follow the manufacturer's instructions carefully and ensure proper ventilation.
3. Fill Any Gaps or Cracks
After sanding, inspect the table for any cracks, gaps, or imperfections. Use wood filler to repair these areas, ensuring a smooth and even surface. Allow the filler to dry completely before sanding it smooth with fine-grit sandpaper.
Applying the Stain
With the surface properly prepared, you can now move onto the exciting part – applying the stain. The key here is consistency and even application for a professional-looking result.
1. Choose Your Stain
Select a stain that complements your oak table and home decor. Consider the color and tone you want to achieve. Oak naturally accepts stain beautifully, so you have a wide array of options.
2. Apply the Stain Evenly
Using a clean rag or brush, apply a thin, even coat of stain, working in the direction of the wood grain. Avoid pooling or over-saturation, as this can lead to uneven results. Let the stain sit for the recommended time (check the manufacturer's instructions) before wiping away any excess with a clean cloth.
3. Apply Multiple Coats (if necessary)
For a richer, deeper color, you may need to apply multiple coats of stain. Allow each coat to dry completely before applying the next. Always follow the manufacturer's instructions regarding drying time.
Sealing and Finishing Your Oak Table
The final step is to seal and finish your newly stained oak table, protecting it from wear and tear while enhancing its beauty.
1. Choose a Protective Finish
Select a clear finish that complements your chosen stain. Options include polyurethane, varnish, or shellac. Polyurethane is a popular choice for its durability and water resistance.
2. Apply the Finish
Apply thin, even coats of your chosen finish, allowing each coat to dry completely before applying the next. Sand lightly with fine-grit sandpaper between coats to smooth out any imperfections.
3. Let it Cure
Allow the final coat of finish to cure completely according to the manufacturer's instructions before using your beautifully refinished oak table.
Maintaining Your Refinished Oak Table
To keep your oak table looking its best, regular cleaning and maintenance are key. Use a gentle cleaner and avoid abrasive cleaners or harsh chemicals. Periodically, you can apply a fresh coat of finish to maintain the protection and beauty of your table for years to come. With proper care, your refinished oak table will be a cherished piece in your home for generations.
Featured Posts
Also read the following articles
| Article Title | Date |
|---|---|
| How Wide Are Fence Boards | Mar 26, 2025 |
| Oi All In One Milk How To Use | Mar 26, 2025 |
| 8 Inches How Long | Mar 26, 2025 |
| How To Restain Fiberglass Door | Mar 26, 2025 |
| Knotless Braids How Much | Mar 26, 2025 |
Latest Posts
Thank you for visiting our website which covers about How To Restain An Oak Table . We hope the information provided has been useful to you. Feel free to contact us if you have any questions or need further assistance. See you next time and don't miss to bookmark.
