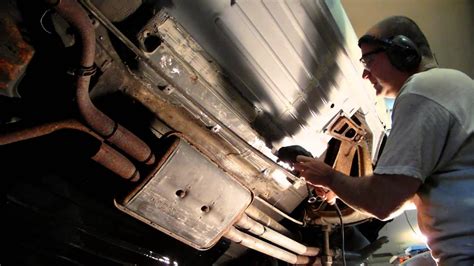
How To Strip Undercoating
Ronan Farrow
Apr 02, 2025 · 3 min read

Table of Contents
How to Strip Undercoating: A Comprehensive Guide
Undercoating, while initially protective, can become a problem over time. It can chip, peel, and rust, creating an unsightly and potentially damaging situation for your vehicle. Knowing how to strip undercoating effectively is crucial for maintaining your car's value and structural integrity. This guide provides a comprehensive approach to removing undercoating, focusing on safety and efficiency.
Understanding Undercoating and its Removal
Before diving into the removal process, it's essential to understand the types of undercoating and their properties. There are generally two main types:
-
Oil-based undercoating: This type is typically more difficult to remove and often requires more aggressive methods. It's usually black and sticky.
-
Rubberized undercoating: This is generally easier to remove and may respond better to less abrasive techniques. It's often a textured, slightly flexible coating.
Identifying the type of undercoating on your vehicle will guide your choice of removal methods.
Tools and Materials You'll Need
Stripping undercoating requires the right tools and equipment for a safe and effective job. Here's a checklist:
- Safety gear: Eye protection (safety glasses), gloves, and a respirator are absolutely crucial. Undercoating often contains harmful chemicals.
- Scrapers: A variety of scrapers will be useful, including plastic scrapers (to avoid scratching the metal), metal scrapers, and putty knives.
- Wire brush: A wire brush, either handheld or attached to a drill, helps remove stubborn undercoating.
- Chemical stripper: Choose a chemical stripper specifically designed for undercoating. Always read and follow the manufacturer's instructions carefully. Note: This is an optional method, but often the most effective for larger areas.
- Pressure washer: A pressure washer can significantly aid in removing softened undercoating.
- Solvent (optional): Depending on the undercoating type, a solvent might help soften it before scraping. Test this on a small, inconspicuous area first.
- Cleaning rags or shop towels: For cleaning up the mess.
- Protective covering (optional): Consider covering surrounding areas to prevent accidental damage or chemical spills.
Step-by-Step Undercoating Removal Process
The process may vary depending on the type and thickness of the undercoating, as well as the tools you choose to use. However, these steps provide a general guideline:
1. Preparation is Key: Safety First!
Before beginning, thoroughly clean the area you'll be working on. This will improve the effectiveness of the removal process. Don't forget to put on your safety gear!
2. Choose Your Removal Method
- Manual scraping: For smaller areas or less stubborn undercoating, manual scraping with plastic and metal scrapers might suffice. Be patient and methodical.
- Chemical stripping: Apply the chemical stripper according to the manufacturer's instructions. Allow it to dwell for the recommended time, then scrape away the softened undercoating. This is ideal for large areas but requires careful handling due to chemical exposure.
- Pressure washing: Once the undercoating is loosened, a pressure washer can help remove it more quickly. Maintain a safe distance and use appropriate pressure settings.
3. Thorough Cleaning
After removing the undercoating, thoroughly clean the area to remove any remaining residue. Use a solvent if necessary, but always follow safety precautions.
4. Post-Removal Treatment (Optional)
Once the area is clean and dry, consider applying a rust preventative or a new layer of undercoating if desired.
Safety Precautions: Emphasized
- Ventilation: Work in a well-ventilated area or use a respirator to avoid inhaling fumes from the chemical stripper or the undercoating itself.
- Chemical Handling: Always read and follow the manufacturer's instructions for any chemical products used.
- Eye Protection: Wear safety glasses to prevent eye irritation or injury from flying debris.
- Skin Protection: Wear gloves to prevent skin irritation or contact dermatitis.
Conclusion: A Clean Slate for Your Vehicle
Removing undercoating can be a laborious task, but the results are worth the effort. By following these steps and prioritizing safety, you can effectively strip your vehicle's undercoating and restore its appearance and structural integrity. Remember, patience is key, and prioritizing safety throughout the process is paramount.
Featured Posts
Also read the following articles
| Article Title | Date |
|---|---|
| How To Read An Emf Detector | Apr 02, 2025 |
| How To Start A Sign Business | Apr 02, 2025 |
| How To Take Good Senior Pictures | Apr 02, 2025 |
| How To Tell Prius Model By Vin | Apr 02, 2025 |
| How To Stay Cool At Baseball Game | Apr 02, 2025 |
Latest Posts
-
Emsculpt Neo How Many Sessions
Apr 03, 2025
-
Elizavecca How To Use
Apr 03, 2025
-
Elegoo Mercury Plus How Long To Wash
Apr 03, 2025
-
Durex Strawberry Lube How To Use
Apr 03, 2025
-
Does Howes Diesel Treatment Go Bad
Apr 03, 2025
Thank you for visiting our website which covers about How To Strip Undercoating . We hope the information provided has been useful to you. Feel free to contact us if you have any questions or need further assistance. See you next time and don't miss to bookmark.
