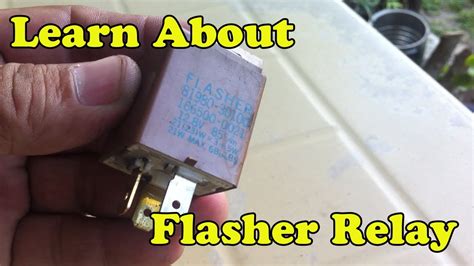
How To Test Turn Signal Relay
Ronan Farrow
Mar 26, 2025 · 4 min read

Table of Contents
How to Test a Turn Signal Relay: A Comprehensive Guide
Knowing how to test a turn signal relay can save you time and money on car repairs. A faulty relay can cause your turn signals to malfunction, leading to dangerous driving situations. This guide will walk you through the process, explaining what a turn signal relay does and how to diagnose problems effectively.
Understanding Your Turn Signal Relay
Before jumping into testing, let's understand the role of this crucial component. The turn signal relay acts as a switch, controlling the flow of electricity to your turn signal lights. It's responsible for the characteristic flashing pattern. When a relay fails, you might experience:
- No flashing lights: The lights might stay on constantly or not illuminate at all.
- Rapid flashing: This often indicates a burned-out bulb.
- Intermittent flashing: The lights might flash erratically or intermittently.
These symptoms clearly indicate the need for a test.
Tools You'll Need
Testing your turn signal relay requires minimal tools. You'll need:
- A test light: This inexpensive tool is crucial for checking for the presence of electricity.
- A multimeter (optional): While a test light is sufficient, a multimeter provides more precise measurements of voltage and continuity.
- Your vehicle's owner's manual: This will help you locate the turn signal relay and understand its specific location and type. Relay locations vary between car makes and models.
- Screwdrivers (possibly): Depending on your vehicle, you might need screwdrivers to access the relay.
Step-by-Step Testing Procedure
Follow these steps to thoroughly test your turn signal relay:
Step 1: Locate the Turn Signal Relay
Consult your owner's manual to find the location of your vehicle's turn signal relay. It's usually located in the fuse box, often under the hood or dashboard. The relay itself is usually a small square or rectangular component.
Step 2: Visually Inspect the Relay
Before powering anything on, visually inspect the relay. Check for any signs of physical damage, such as burns, cracks, or corrosion. If you notice any damage, it's highly likely the relay needs replacement.
Step 3: The Test Light Method
- Disconnect the relay: Carefully remove the relay from its socket.
- Prepare your test light: Connect your test light to a known good ground.
- Test for power: With the ignition turned on, touch the test light probe to the relay socket's power terminal. Your owner's manual or online resources (specific to your vehicle's make and model) will help you identify the power terminal. If the test light illuminates, power is reaching the relay.
- Test for continuity (optional but helpful): If you have a multimeter, test for continuity between the relay's terminals using the continuity setting. A good relay should show continuity.
Step 4: The Multimeter Method (Advanced)
This method provides more detailed diagnostics:
- Set your multimeter: Set your multimeter to the appropriate resistance or continuity setting.
- Test continuity between terminals: Test for continuity between various terminals on the relay according to the relay's specifications. Refer to your owner's manual or online resources for specific details. The results should match the specifications provided in the documentation. If you don't get readings in line with the documentation, the relay is likely faulty.
- Voltage Test: With the ignition switched on, test the voltage at the relay socket terminals. A proper voltage reading should be present. Again, your owner's manual will guide you through the correct voltage to expect at each point.
Step 5: Replace the Relay (If Necessary)
If your tests indicate a faulty relay, replace it with a new one of the same type. Be sure to carefully install the new relay, making sure it's correctly seated in the socket.
Troubleshooting Tips
- Always disconnect the negative battery terminal before working with electrical components. This will prevent short circuits and potential damage.
- If you're unsure about any step, consult a qualified mechanic.
- Ensure that the replacement relay is the exact same type and specifications as the original. Using an incorrect relay could cause further issues.
By following these steps, you can effectively test your turn signal relay and resolve any associated issues. Remember safety first and always consult your owner's manual for specific details regarding your vehicle's electrical system.
Featured Posts
Also read the following articles
| Article Title | Date |
|---|---|
| How To Stop Shakes From Alcohol Withdrawal | Mar 26, 2025 |
| How To Tan A Coyote Tail | Mar 26, 2025 |
| How To Run For City Council California | Mar 26, 2025 |
| Parasite Die Off Symptoms How Long | Mar 26, 2025 |
| How To Use Crystallized Ginger In Tea | Mar 26, 2025 |
Latest Posts
Thank you for visiting our website which covers about How To Test Turn Signal Relay . We hope the information provided has been useful to you. Feel free to contact us if you have any questions or need further assistance. See you next time and don't miss to bookmark.
