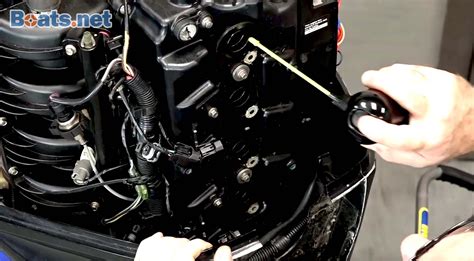
How To Winterize A 4 Stroke Outboard
Ronan Farrow
Mar 20, 2025 · 3 min read

Table of Contents
How to Winterize a 4-Stroke Outboard: A Comprehensive Guide
Winterizing your 4-stroke outboard is crucial for protecting it from the damaging effects of freezing temperatures. Neglecting this essential maintenance task can lead to costly repairs in the spring. This comprehensive guide will walk you through the process step-by-step, ensuring your outboard is ready for the cold weather.
Preparing Your 4-Stroke Outboard for Winter Storage
Before you begin the winterization process, it's essential to prepare your outboard and have the necessary tools and materials readily available. This will make the process smoother and more efficient.
Essential Tools and Materials:
- Fuel stabilizer: Prevents fuel from deteriorating during storage.
- Fogging oil: Protects internal engine parts from corrosion.
- Fresh water: For flushing the cooling system.
- Shop rags or absorbent towels: For cleaning up spills and excess fluids.
- Funnel: For safely transferring fluids.
- Container for draining fluids: To collect used oil and water.
- Manual for your specific outboard model: This will provide detailed instructions tailored to your engine.
Initial Steps:
- Clean your outboard: Remove any dirt, debris, salt, or grime from the engine and lower unit. This prevents corrosion during storage.
- Run the engine: Let the engine run for a few minutes to warm it up. This ensures that the engine is at its optimal operating temperature for the next steps.
The Winterization Process: A Step-by-Step Guide
The winterization process for a 4-stroke outboard engine involves several crucial steps designed to protect your investment. Follow these steps carefully for optimal protection against winter damage.
1. Flushing the Cooling System:
This crucial step removes salt and other contaminants that can cause corrosion.
- Connect the flushing attachment: Use the provided fitting to connect a garden hose to flush the engine's cooling system.
- Flush thoroughly: Run the engine for several minutes with the flushing attachment connected.
- Disconnect the flushing attachment: Once completed, disconnect the hose.
2. Changing the Gearcase Oil:
Regular gearcase oil changes are vital for maintaining the health of your lower unit.
- Drain the old oil: Locate the drain plug and carefully drain the old gearcase oil into a suitable container.
- Replace with new oil: Fill the gearcase with fresh, high-quality gearcase oil to the correct level. Check your manual for the recommended oil type and quantity.
3. Treating the Fuel System:
Improper fuel storage can cause damage. Preventing fuel deterioration is key.
- Add fuel stabilizer: Add fuel stabilizer to your fuel tank according to the manufacturer's instructions.
- Run the engine: Run the engine for several minutes to circulate the treated fuel throughout the system.
4. Fogging the Engine:
This crucial step lubricates the internal components and protects them from corrosion.
- Spray fogging oil: With the engine running, carefully spray fogging oil into the carburetor or throttle body (Refer to your owner’s manual for the exact location and method). Follow the directions on the fogging oil product.
5. Storing Your Outboard:
Proper storage helps protect your outboard engine from the elements.
- Store in a dry location: Keep your outboard in a dry, clean, and well-ventilated area, ideally inside a garage or shed.
- Cover your outboard: Protect it further with a suitable cover designed to repel moisture and debris.
Maintaining Your Outboard During Winter Storage
Regular inspections during winter storage can help identify potential issues and avoid surprises in the spring. While you'll want to primarily let the outboard rest, occasional checks are recommended.
Additional Tips:
- Consult your owner's manual: This guide provides general instructions, but your outboard's manual may contain specific recommendations tailored to your model.
- Take photos: Take pictures of the process to aid in future winterizations.
By following these steps, you can effectively winterize your 4-stroke outboard and ensure it's ready for action when the boating season rolls around again. Remember, proper winterization significantly extends your outboard's lifespan, saving you money and hassle in the long run.
Featured Posts
Also read the following articles
| Article Title | Date |
|---|---|
| Chicago How The Grinch Stole Christmas | Mar 20, 2025 |
| How To Use Tanned Af | Mar 20, 2025 |
| How To Turn Off A Street Light | Mar 20, 2025 |
| How To Test Glow Plug Relay | Mar 20, 2025 |
| Raz Tn9000 How To Use | Mar 20, 2025 |
Latest Posts
Thank you for visiting our website which covers about How To Winterize A 4 Stroke Outboard . We hope the information provided has been useful to you. Feel free to contact us if you have any questions or need further assistance. See you next time and don't miss to bookmark.
