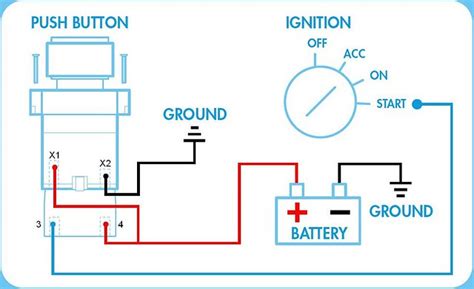
How To Wire A Push Button
Ronan Farrow
Mar 26, 2025 · 3 min read

Table of Contents
How to Wire a Push Button: A Comprehensive Guide
Wiring a push button might seem daunting, but with a clear understanding of the basics, it's a straightforward process. This guide provides a step-by-step approach to wiring different types of push buttons, covering both momentary and latching switches, and addressing common applications. Whether you're working on a simple circuit or a more complex project, this guide will help you confidently connect your push button.
Understanding Push Button Types and Terminology
Before diving into the wiring process, let's clarify the different types of push buttons and key terminology:
Momentary Push Buttons:
- Definition: These buttons only complete the circuit while being pressed. Release the button, and the circuit is broken. Think of a standard doorbell button.
- Common Applications: Controlling lights briefly, activating momentary actions, simple on/off switches in certain contexts.
Latching Push Buttons (Maintained Contact):
- Definition: These buttons switch between two states (on and off) with each press. One press activates the circuit; another press deactivates it.
- Common Applications: Turning devices on and off, controlling power to circuits, more complex switching systems.
Key Terminology:
- Normally Open (NO): The circuit is open when the button is not pressed. Pressing the button closes the circuit.
- Normally Closed (NC): The circuit is closed when the button is not pressed. Pressing the button opens the circuit.
- Common (COM): The common terminal connects to both the NO and NC terminals.
Wiring a Momentary Push Button (NO)
This is the most common type of push button wiring. Let's assume you're using a simple circuit to control an LED.
Materials:
- Momentary push button (NO)
- LED
- Resistor (to limit current to the LED – choose an appropriate value based on your LED and power supply)
- Power supply (e.g., battery)
- Wires
Wiring Diagram:
+Power Supply ---[Resistor]---[LED]---[Push Button (NO)]---Ground
                                          ^
                                          |
                                     Press to close circuit
Steps:
- Connect the positive terminal of the power supply to one end of the resistor.
- Connect the other end of the resistor to the positive leg of the LED.
- Connect the negative leg of the LED to one terminal of the push button (NO).
- Connect the other terminal of the push button (NO) to the ground (negative terminal) of your power supply.
When you press the button, the circuit closes, and the LED lights up. When you release the button, the circuit opens, and the LED turns off.
Wiring a Latching Push Button
Latching push buttons require a slightly more complex circuit, often involving a relay or microcontroller. These are beyond the scope of a simple wiring tutorial but involve using the push button to switch between states, generally using a bistable system.
Troubleshooting Common Issues
- Button not working: Check all connections. Ensure the button is properly seated and not faulty. Verify power supply voltage.
- LED always on: Check for shorts in the circuit.
- Incorrect behavior: Double-check the wiring diagram and ensure you're using the correct type of push button (NO or NC).
This guide provides a foundation for wiring push buttons. Remember to always prioritize safety and use appropriate safety measures when working with electricity. Further research based on your specific project and chosen components is recommended.
Featured Posts
Also read the following articles
| Article Title | Date |
|---|---|
| How To Tell If Hyperpigmentation Is Permanent | Mar 26, 2025 |
| How To Test If Fishing Line Is Still Good | Mar 26, 2025 |
| How To Turn Off Nest Seasonal Savings | Mar 26, 2025 |
| Lost Thc Thc6000 How To Use | Mar 26, 2025 |
| How To Stop Getting Mail From Previous Tenants | Mar 26, 2025 |
Latest Posts
Thank you for visiting our website which covers about How To Wire A Push Button . We hope the information provided has been useful to you. Feel free to contact us if you have any questions or need further assistance. See you next time and don't miss to bookmark.
