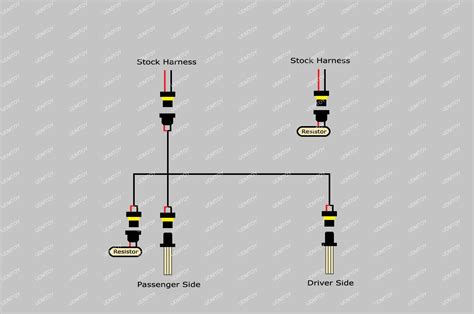
How To Wire In Daytime Running Lights
Ronan Farrow
Mar 20, 2025 · 3 min read

Table of Contents
How to Wire in Daytime Running Lights (DRLs)
Daytime running lights (DRLs) are a fantastic safety feature, significantly improving your vehicle's visibility during the day. Wiring them in yourself can save you money compared to professional installation, and it's a rewarding project for the DIY enthusiast. This guide will walk you through the process, providing clear instructions and safety tips. Remember to always consult your vehicle's manual before undertaking any electrical work.
Understanding Your Vehicle's Electrical System
Before you begin, it's crucial to understand your vehicle's electrical system. This includes identifying:
- Power Source: You'll need a switched power source that activates only when the ignition is on. This typically comes from the fuse box. Incorrect wiring can drain your battery.
- Grounding Point: Find a suitable grounding point, a clean metal surface that provides a solid earth connection. Loose grounding can lead to malfunctioning lights.
- Relay (Recommended): Using a relay is highly recommended to protect your vehicle's wiring and prevent overloading. It handles the high current draw of the DRLs, leaving your vehicle's wiring intact.
Tools and Materials You'll Need
Gather these essentials before you begin:
- Daytime Running Lights (DRLs): Choose lights that are appropriate for your vehicle's make and model.
- Wiring Harness: A pre-made harness simplifies the wiring process and ensures proper connections.
- Relay: A 12V automotive relay is essential for protecting your vehicle's electrical system.
- In-line Fuse: Protect your wiring with an appropriately sized fuse.
- Wire Strippers/Cutters: For preparing your wires for connection.
- Electrical Tape: For insulating connections and protecting against shorts.
- Crimping Tool: For securely connecting wires to terminals and connectors.
- Test Light or Multimeter: To verify power and ground connections.
- Socket Wrench (Appropriate Size): For accessing the fuse box and grounding point.
- Safety Glasses: To protect your eyes from potential hazards.
Step-by-Step Wiring Instructions
1. Planning and Preparation:
- Choose your DRL location: Decide where you want to mount your DRLs. Consider visibility and ease of wiring.
- Plan your wiring route: Decide the path your wires will take to minimize damage and maximize concealment.
- Gather your materials: Ensure you have all the necessary tools and materials ready.
2. Installing the DRLs:
- Mount the lights securely: Use appropriate mounting hardware to attach the lights to your vehicle.
- Run the wires: Carefully route the wires along your chosen path, securing them with zip ties or other fasteners. Avoid running wires near moving parts.
3. Wiring the Relay:
This is the crucial step to protect your car's electrical system. Refer to your relay's wiring diagram for specific connections. Typically:
- 85: Connect to switched power (ignition-on).
- 86: Connect to ground.
- 30: Connect to battery positive (+12V).
- 87: Connect to the positive (+) wire of your DRLs.
4. Connecting the DRLs:
- Connect the negative (-) wire of your DRLs to a suitable ground point. Ensure a solid connection.
- Connect the positive (+) wire of your DRLs to the output of the relay (terminal 87).
5. Adding the Fuse:
- Install an in-line fuse in the positive (+) wire from the battery to the relay (terminal 30). This will protect your vehicle's electrical system from short circuits.
6. Testing and Completion:
- Turn on your ignition. Your DRLs should illuminate.
- Check all connections for security. Ensure all wires are securely fastened and taped to prevent shorts.
Troubleshooting
If your DRLs don't work:
- Check the fuse: Replace if blown.
- Verify power and ground connections: Use a test light or multimeter to ensure proper connections.
- Inspect wiring for damage or shorts: Repair or replace any damaged wires.
- Check the relay: Ensure it is properly wired and functioning correctly.
Remember, safety is paramount. If you're uncomfortable with any aspect of this process, it's best to consult a qualified automotive electrician. This guide provides a general overview; specific wiring requirements may vary depending on your vehicle. Always consult your vehicle's manual for specific instructions and safety precautions.
Featured Posts
Also read the following articles
| Article Title | Date |
|---|---|
| How Do You Force Someone Into Rehab | Mar 20, 2025 |
| How Do You Adjust A Hydraulic Clutch | Mar 20, 2025 |
| How To Test Ignition Condenser | Mar 20, 2025 |
| 5000 In 1977 Is Worth How Much Today | Mar 20, 2025 |
| 86 Weeks Is How Many Months | Mar 20, 2025 |
Latest Posts
Thank you for visiting our website which covers about How To Wire In Daytime Running Lights . We hope the information provided has been useful to you. Feel free to contact us if you have any questions or need further assistance. See you next time and don't miss to bookmark.
