How To Clean A Plastic Weed Grinder
Ronan Farrow
Mar 24, 2025 · 3 min read

Table of Contents
How to Clean a Plastic Weed Grinder: A Step-by-Step Guide
Cleaning your weed grinder might not be the most glamorous task, but it's essential for maintaining its functionality and ensuring a smooth, flavorful smoking experience. A dirty grinder can harbor old resin, leading to a less-than-pleasant taste and potentially impacting the efficiency of your grinding. This guide provides a comprehensive, step-by-step method for effectively cleaning your plastic weed grinder.
Why Clean Your Grinder?
Before diving into the cleaning process, let's understand why regular cleaning is crucial:
Improved Taste and Smell: A buildup of old resin and plant matter significantly affects the taste and aroma of your herb. Cleaning ensures a fresh, clean taste with every use.
Enhanced Grinding Performance: A clogged grinder won't grind as effectively. Cleaning keeps the grinding mechanism free-flowing, making the process smoother and easier.
Hygiene and Prevention of Mold: A dirty grinder is a breeding ground for bacteria and mold. Regular cleaning promotes hygiene and prevents the growth of harmful microorganisms.
The Cleaning Process: A Step-by-Step Guide
Here's how to effectively clean your plastic weed grinder:
Step 1: Disassembly
Carefully disassemble your grinder into its individual parts. This typically involves separating the top chamber, the grinding teeth, and the bottom chamber.
Step 2: Initial Cleaning
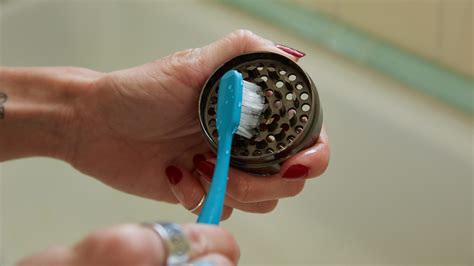
Use a small brush (like an old toothbrush) to remove loose plant material from each part. This initial scrubbing will significantly reduce the amount of resin you need to deal with in the next steps.
Step 3: Soaking
Soak the grinder parts in a container filled with isopropyl alcohol (IPA). The higher the percentage of alcohol (ideally 99%), the more effective the cleaning. Allow the parts to soak for at least 30 minutes, or even longer for stubborn resin buildup. Note: Always work in a well-ventilated area.
Step 4: Scrubbing
After soaking, use your brush to scrub each part thoroughly. Pay special attention to the grinding teeth, where most of the resin tends to accumulate. For stubborn resin, you can gently use a cotton swab dipped in IPA.
Step 5: Rinsing
Once you've scrubbed everything thoroughly, rinse all the parts under cold running water. Ensure that all traces of IPA and plant matter are removed.
Step 6: Drying
Thoroughly dry all parts using a clean towel or allow them to air dry completely. Ensure everything is completely dry before reassembling to prevent mold growth.
Step 7: Reassembly
Once everything is dry, carefully reassemble your grinder.
Maintaining a Clean Grinder
To keep your grinder clean and functioning optimally, consider these tips:
- Regular Cleaning: Clean your grinder after every few uses to prevent resin buildup.
- Gentle Grinding: Avoid over-grinding, as this can lead to excess resin accumulation.
- Proper Storage: Store your grinder in a cool, dry place, away from direct sunlight.
Alternative Cleaning Methods
While IPA is the most effective method, you can also try using warm soapy water. This method is less effective for stubborn resin but is a good option for routine cleaning.
Following these steps will keep your plastic weed grinder clean, efficient, and ready for your next use. Remember safety first, always work in a well-ventilated area when using isopropyl alcohol.
Featured Posts
Also read the following articles
| Article Title | Date |
|---|---|
| How To Find Leak In Pond Liner | Mar 24, 2025 |
| How To Get Starch Out Of Jeans | Mar 24, 2025 |
| How To Get To Level 20 Fast In Valorant | Mar 24, 2025 |
| How To Convert Eyeglass Prescription To Contacts | Mar 24, 2025 |
| How To Cook Aubergine In Microwave | Mar 24, 2025 |
Latest Posts
-
How Fast Does A 90 Hp Pontoon Boat Go
Apr 04, 2025
-
How Fast Does A 400ex Go
Apr 04, 2025
-
How Fast Does A 36v Golf Cart Go
Apr 04, 2025
-
How Fast Does A 36 Volt Golf Cart Go
Apr 04, 2025
-
How Fast Do Red Root Floaters Grow
Apr 04, 2025
Thank you for visiting our website which covers about How To Clean A Plastic Weed Grinder . We hope the information provided has been useful to you. Feel free to contact us if you have any questions or need further assistance. See you next time and don't miss to bookmark.
