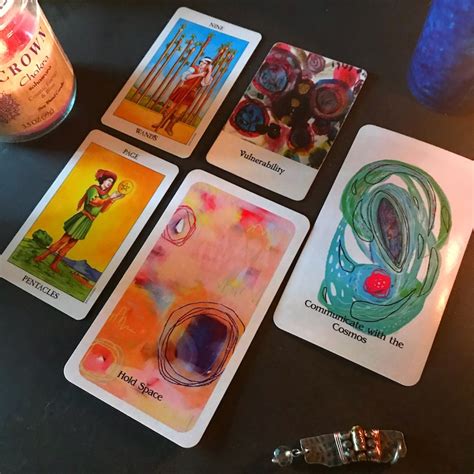
How To Make Your Own Oracle Cards
Ronan Farrow
Mar 25, 2025 · 4 min read

Table of Contents
How to Make Your Own Oracle Cards: A Creative and Spiritual Journey
Creating your own oracle card deck is a deeply rewarding experience, blending creativity, intuition, and spirituality. It's a fantastic way to connect with your inner wisdom and develop a personalized divination tool. This comprehensive guide will walk you through the entire process, from initial concept to final presentation.
Step 1: Defining Your Oracle Card Deck's Theme and Purpose
Before you even think about art supplies, it's crucial to define the theme and purpose of your deck. What kind of guidance will your cards provide? Will they focus on:
- Self-discovery? Cards focused on self-reflection, personal growth, and shadow work.
- Daily guidance? Cards offering simple advice and insights for navigating daily life.
- Spiritual growth? Cards relating to spiritual practices, energy work, and connection to the divine.
- Relationship advice? Cards focusing on improving communication and understanding in relationships.
- Creative inspiration? Cards sparking creativity and providing prompts for artistic endeavors.
The possibilities are truly endless! Narrowing down your focus will make the entire process much smoother and more meaningful. Consider writing a short description of your deck's intended purpose and the type of guidance it will offer. This will act as your guiding star throughout the creation process.
Step 2: Gathering Inspiration and Ideas
Once you have a theme, start brainstorming. Inspiration can come from anywhere:
- Nature: Flowers, animals, landscapes – these all hold symbolic meaning.
- Archetypes: Explore the classic archetypes of mythology and folklore.
- Emotions: Represent feelings through imagery and color.
- Affirmations: Craft positive and empowering statements.
- Dreams: Tap into your subconscious for unique symbols and ideas.
Keep a notebook or digital document handy to jot down ideas, keywords, and sketches. Don't censor yourself at this stage; let your creativity flow freely. Collect images that resonate with your theme – these can serve as inspiration for your card designs.
Step 3: Designing Your Oracle Cards
This is where the fun begins! Consider the following:
- Card Size and Material: Standard playing card size (2.5" x 3.5") is a good starting point. You can use cardstock, watercolor paper, or even recycled materials.
- Artwork: Will you use drawings, paintings, collages, or digital art? Experiment and find a style that suits your theme and artistic abilities. Keep the imagery simple and evocative. Avoid overly cluttered designs.
- Keywords and Guidance: Each card needs a concise keyword or phrase to summarize its message. You'll also need a longer description of the card's meaning and potential interpretations.
Create a template to ensure consistency. This could be a digital template or a hand-drawn one. This will make the design process much more efficient.
Step 4: Creating the Artwork and Writing the Guidebook
Now it's time to bring your vision to life. Create the artwork for each card, keeping your chosen theme and keywords in mind. Once the artwork is complete, write the accompanying guidebook. This should provide detailed descriptions of each card's meaning, potential interpretations, and how to use the cards in a reading.
Remember, your guidebook is as important as the cards themselves. It's what will help you and others unlock the full potential of your deck.
Step 5: Assembling and Presenting Your Oracle Card Deck
Once your artwork is complete and your guidebook is written, it's time to assemble your deck. Carefully cut and trim your cards and arrange them in the order you've designed. Consider adding a title page and a short introduction to your guidebook.
You can choose to present your deck in a simple box or create a more elaborate presentation. Consider using a fabric cover or a custom-made box. The key is to create a presentation that reflects the unique nature of your oracle cards.
Step 6: Refining and Using Your Deck
After creating your deck, take some time to reflect on your creation. Use the cards for your own readings to gain further insight and refine your understanding of each card's meaning. You can also solicit feedback from trusted friends or family to gain alternative perspectives and identify areas for improvement.
Creating your own oracle cards is a deeply personal and enriching experience. Embrace the journey, trust your intuition, and enjoy the creative process. Your unique deck will serve as a powerful tool for self-discovery and spiritual growth for years to come.
Featured Posts
Also read the following articles
| Article Title | Date |
|---|---|
| How To Price Pottery | Mar 25, 2025 |
| How To Prove Strangulation In Court | Mar 25, 2025 |
| How To Make A Swollen Jaw Go Down | Mar 25, 2025 |
| How To Read Carrier Model Number | Mar 25, 2025 |
| How To Kindergarten Books | Mar 25, 2025 |
Latest Posts
Thank you for visiting our website which covers about How To Make Your Own Oracle Cards . We hope the information provided has been useful to you. Feel free to contact us if you have any questions or need further assistance. See you next time and don't miss to bookmark.
