How To Make Hibernate Shortcut In Windows 11
Ronan Farrow
Feb 24, 2025 · 3 min read
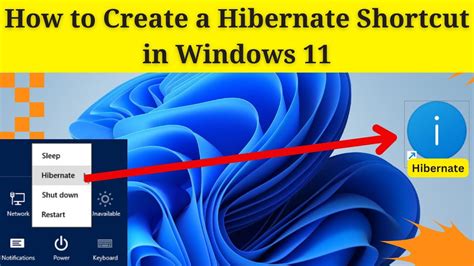
Table of Contents
How to Make a Hibernate Shortcut in Windows 11
Windows 11 doesn't offer a readily available Hibernate option in the Start Menu or Power Options by default. This can be frustrating for users who rely on hibernation to save power and quickly resume their work. Fortunately, creating a Hibernate shortcut is a simple process that only takes a few minutes. This guide will walk you through the steps, ensuring you can easily hibernate your Windows 11 machine.
Enabling Hibernate Mode (If Necessary)
Before creating the shortcut, you need to ensure that hibernation is enabled in your system's power settings. Follow these steps:
- Open Power Options: Search for "Power Options" in the Windows search bar and select it.
- Choose Your Power Plan: Click on "Choose what the power buttons do."
- Access Advanced Settings: Click on "Change settings that are currently unavailable."
- Enable Hibernate: Scroll down and check the box next to "Hibernate."
- Save Changes: Click "Save changes" to apply the settings.
Now that hibernation is enabled, we can proceed to create the shortcut.
Creating the Hibernate Shortcut
We'll create a shortcut that directly executes the powercfg command to hibernate your system. This method is reliable and avoids potential issues with third-party utilities.
- Right-Click on Your Desktop: Right-click on an empty space on your desktop.
- Select "New" -> "Shortcut": From the context menu, choose "New" and then "Shortcut."
- Enter the Command: In the "Type the location of the item" field, paste the following command:
powercfg /hibernate on - Name the Shortcut: Give your shortcut a descriptive name, such as "Hibernate."
- Click "Finish": The shortcut will be created on your desktop.
Testing Your Hibernate Shortcut
Now, you can test your newly created shortcut. Simply double-click the "Hibernate" shortcut on your desktop. Your computer should begin the hibernation process. To resume, simply press the power button.
Adding a Custom Icon (Optional)
To make your shortcut even more visually appealing, you can change its icon.
- Right-click the Shortcut: Right-click on the "Hibernate" shortcut.
- Select "Properties": Choose "Properties" from the context menu.
- Change Icon: In the "Shortcut" tab, click on "Change Icon..."
- Browse for an Icon: Select an icon of your choice and click "OK".
- Apply Changes: Click "Apply" and then "OK" to save the changes.
Troubleshooting
If the Hibernate option is still greyed out after enabling it, try these troubleshooting steps:
- Check your Power Plan: Ensure that your power plan supports hibernation.
- Restart your computer: A simple restart often resolves minor system glitches.
- Update your drivers: Outdated drivers can sometimes interfere with power management features.
- Check for system errors: Run a System File Checker scan (
sfc /scannow) to detect and repair corrupted system files.
By following these steps, you can easily create a convenient Hibernate shortcut in Windows 11, allowing for quick and efficient power saving. Remember, this shortcut provides a direct and reliable way to utilize the hibernation feature, improving your overall workflow and system management.
Featured Posts
Also read the following articles
| Article Title | Date |
|---|---|
| How Do You Make A Pancake Recipe | Feb 24, 2025 |
| How To Negotiate Kaiser Permanente Bill | Feb 24, 2025 |
| How To Get Taller For Kids | Feb 24, 2025 |
| How To Find Area Of The Triangular Prism | Feb 24, 2025 |
| How To Backup Whatsapp Before Changing Phone | Feb 24, 2025 |
Latest Posts
Thank you for visiting our website which covers about How To Make Hibernate Shortcut In Windows 11 . We hope the information provided has been useful to you. Feel free to contact us if you have any questions or need further assistance. See you next time and don't miss to bookmark.

